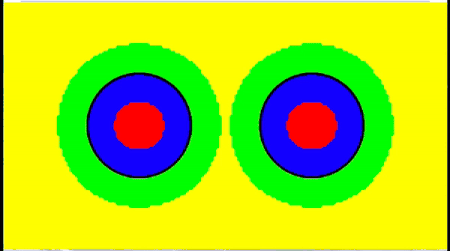
cutoff_min=0.5fcutoff_max=0.6f@Language("AGSL")constvalShaderSource_outlined_color_test_1=""" uniformshadercomposable;uniformfloatcutoff_min;// Minimum cutoff value for transparency uniformfloatborder_thickness;// Thickness of the border uniformfloat3rgbColor;// Custom RGB color (not directly used in this logic) half4main(float2fragCoord){half4color=composable.eval(fragCoord);// Calculate cutoff_max dynamically using border_thickness floatcutoff_max=cutoff_min+border_thickness;// If alpha is exactly 0.0 (fully transparent), set it to yellow if(color.a==0.0){color.rgb=half3(1.0,1.0,0.0);// Yellow for fully transparent }// If alpha is below the minimum cutoff, make it green elseif(color.a<cutoff_min){color.rgb=half3(0.0,1.0,0.0);// Green }// If alpha is within the cutoff range (border area), make it black elseif(cutoff_min<=color.a&&color.a<=cutoff_max){color.rgb=half3(0.0,0.0,0.0);// Black }// If alpha is above the maximum cutoff but less than fully opaque (outer area), make it blue elseif(cutoff_max<color.a&&color.a<1.0){color.rgb=half3(0.0,0.0,1.0);// Blue }// Fully opaque case where alpha = 1, make it red else{color.rgb=half3(1.0,0.0,0.0);// Red }// Ensure alpha is fully opaque for all cases color.a=1.0;returncolor;}"""
@Language("AGSL")constvalShaderSource_outlined_simple=""" uniformshadercomposable;uniformfloatcutoff_min;// Minimum cutoff value for transparency uniformfloatborder_thickness;// Thickness of the border uniformfloat3rgbColor;// RGB color passed as parameter // Constant for black (zero) RGB color consthalf3BLACK_MASK_RGB=half3(0.0,0.0,0.0);half4main(float2fragCoord){half4color=composable.eval(fragCoord);// Calculate cutoff_max dynamically using border_thickness floatcutoff_max=cutoff_min+border_thickness;// If alpha is exactly 0.0 (fully transparent), do nothing if(color.a==0.0){// Do nothing }// If alpha is below the minimum cutoff, // make it fully transparent and black elseif(color.a<cutoff_min){color.rgb=BLACK_MASK_RGB;// Set to black color.a=0.0;// Fully transparent }// If alpha is within the cutoff range (border area), // make it the custom color elseif(cutoff_min<=color.a&&color.a<=cutoff_max){color.rgb=rgbColor;// Set to custom color color.a=1.0;// Fully opaque }// If alpha is above the maximum cutoff but less than // fully opaque (outer area), make it fully transparent and black elseif(cutoff_max<color.a&&color.a<1.0){color.rgb=BLACK_MASK_RGB;// Set to black color.a=0.0;// Fully transparent }// Fully opaque case where alpha = 1 (Icon area), // make it the custom color else{color.rgb=rgbColor;// Set to custom color color.a=1.0;// Fully opaque }returncolor;}"""
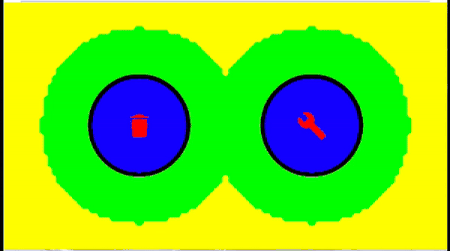
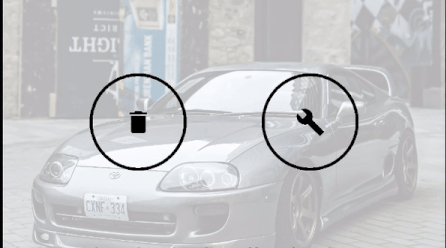
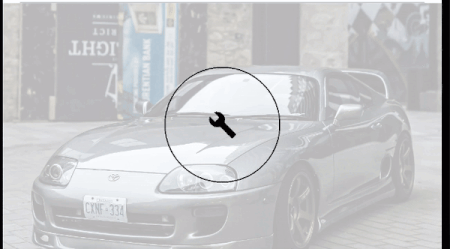
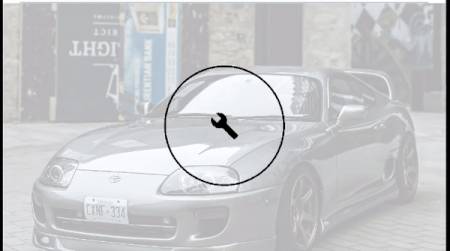
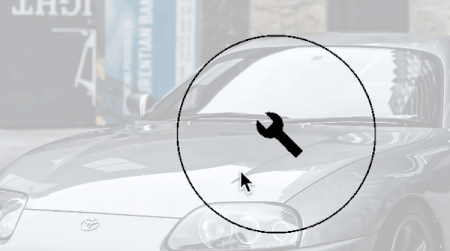
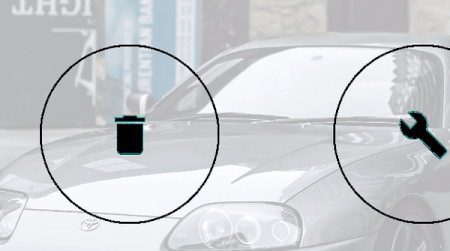
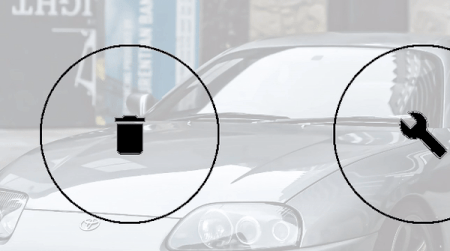
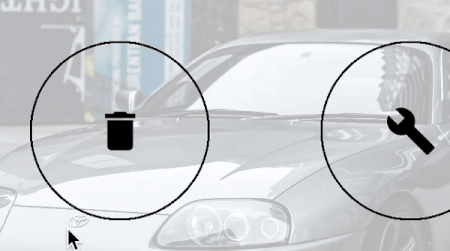
@ComposablefunExampleAGSLOutlineContent(modifier:Modifier=Modifier){varisExpandedbyremember{mutableStateOf(false)}valoffsetDistance=(80).dpvalbuttonOffsetbyanimateDpAsState(targetValue=if(isExpanded)offsetDistanceelse0.dp,animationSpec=tween(durationMillis=7000))valcolor=Color.Black//test visibility start varisVisiblebyremember{mutableStateOf(false)}// Another state for visibility // Derived state to update visibility based on buttonOffset valderivedVisibility=remember(buttonOffset){derivedStateOf{buttonOffset>40.dp}}// Observe derived state and update visibility LaunchedEffect(derivedVisibility.value){isVisible=derivedVisibility.value}//valblurRadius=16.dp//valblurRadius=26.dpvalblurRadius=36.dpOutlineShaderMetaballBox(modifier=modifier,color=color){Box(contentAlignment=Alignment.Center,modifier=Modifier.fillMaxWidth().padding(vertical=24.dp)){BlurCircularButton(Modifier.offset{IntOffset(x=-buttonOffset.roundToPx(),y=0)},onClick={isExpanded=!isExpanded},color=color,blur=blurRadius,){AnimatedVisibility(visible=isVisible,enter=fadeIn(animationSpec=tween(durationMillis=4000)),exit=fadeOut(animationSpec=tween(durationMillis=4000)),){Icon(modifier=Modifier.size(28.dp),imageVector=Icons.Filled.Delete,contentDescription=null,tint=color,)}}BlurCircularButton(Modifier.offset{IntOffset(x=+buttonOffset.roundToPx(),y=0)},onClick={isExpanded=!isExpanded},color=color,blur=blurRadius,){Icon(modifier=Modifier.size(28.dp),imageVector=Icons.Filled.Build,contentDescription=null,tint=color,)}}}}
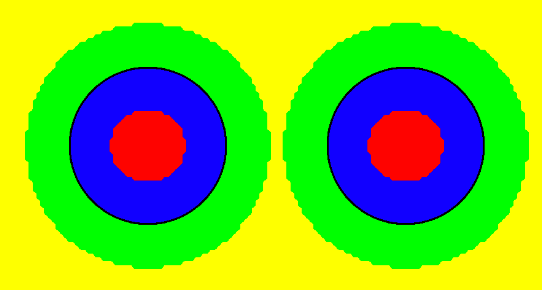
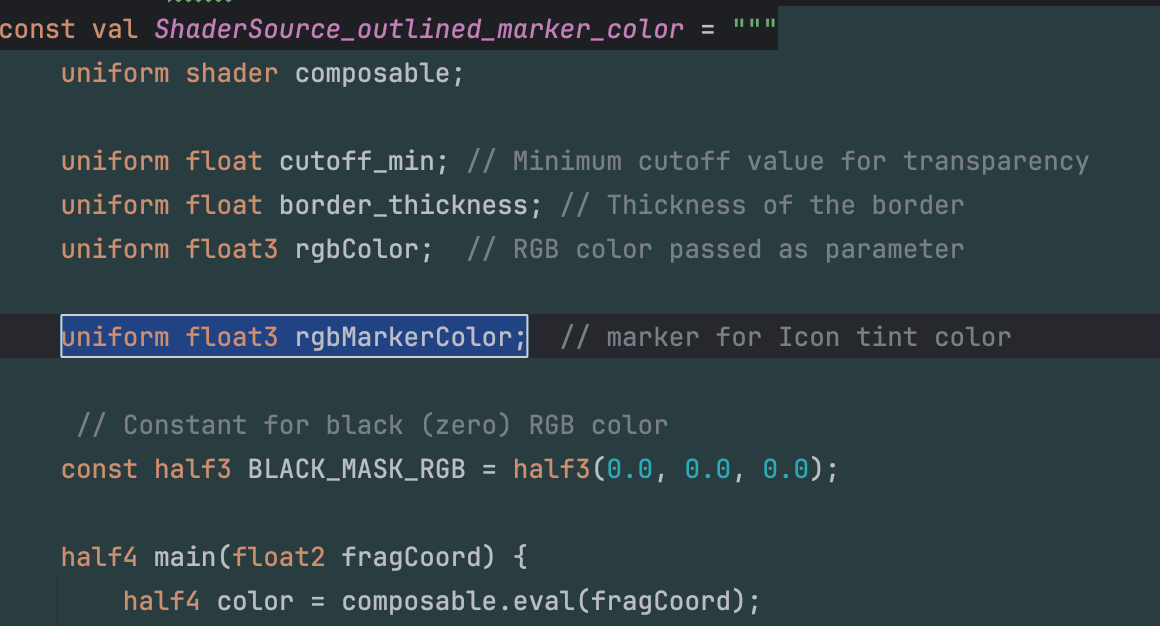
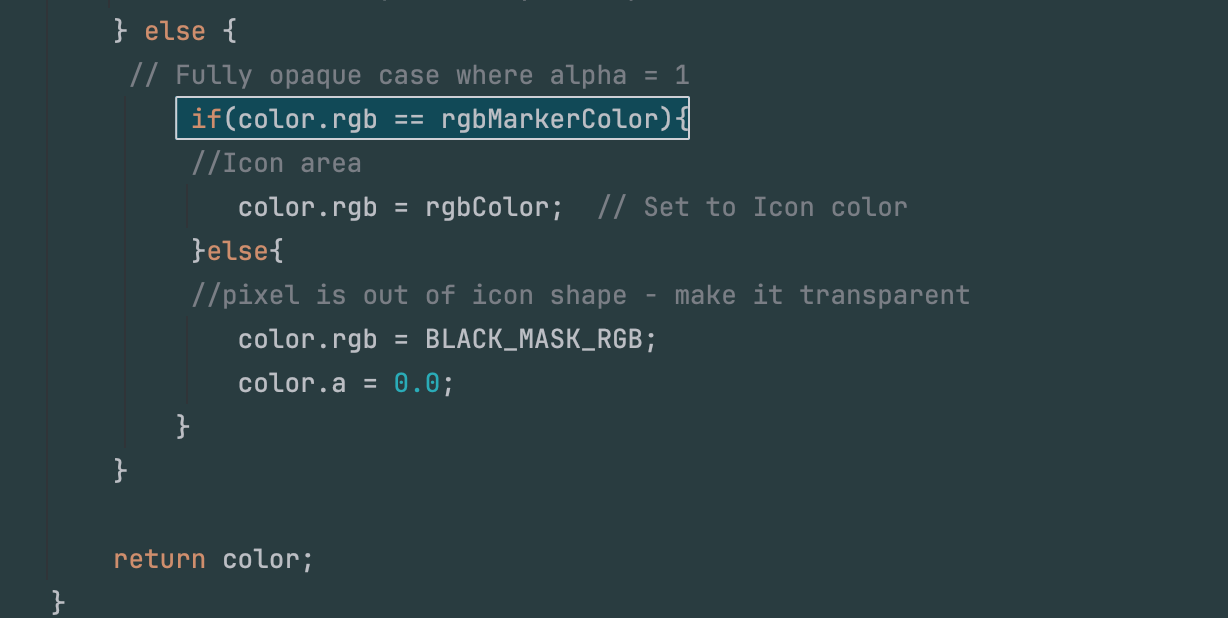
@Language("AGSL")constvalShaderSource_outlined_marker_color=""" uniformshadercomposable;uniformfloatcutoff_min;// Minimum cutoff value for transparency uniformfloatborder_thickness;// Thickness of the border uniformfloat3rgbColor;// RGB color passed as parameter uniformfloat3rgbMarkerColor;// marker for Icon tint color // Constant for black (zero) RGB color consthalf3BLACK_MASK_RGB=half3(0.0,0.0,0.0);half4main(float2fragCoord){half4color=composable.eval(fragCoord);// Calculate cutoff_max dynamically using border_thickness floatcutoff_max=cutoff_min+border_thickness;// If alpha is exactly 0.0 (fully transparent), do nothing if(color.a==0.0){// Do nothing }// If alpha is below the minimum cutoff, // make it fully transparent and black elseif(color.a<cutoff_min){color.rgb=BLACK_MASK_RGB;// Set to black color.a=0.0;// Fully transparent }// If alpha is within the cutoff range (border area), // make it the custom color elseif(cutoff_min<=color.a&&color.a<=cutoff_max){color.rgb=rgbColor;// Set to custom color color.a=1.0;// Fully opaque }// If alpha is above the maximum cutoff but less than // fully opaque (outer area), make it fully transparent and black elseif(cutoff_max<color.a&&color.a<1.0){color.rgb=BLACK_MASK_RGB;// Set to black color.a=0.0;// Fully transparent }else{// Fully opaque case where alpha = 1 if(color.rgb==rgbMarkerColor){//Icon area color.rgb=rgbColor;// Set to Icon color }else{//pixel is out of icon shape - make it transparent color.rgb=BLACK_MASK_RGB;color.a=0.0;}}returncolor;}"""
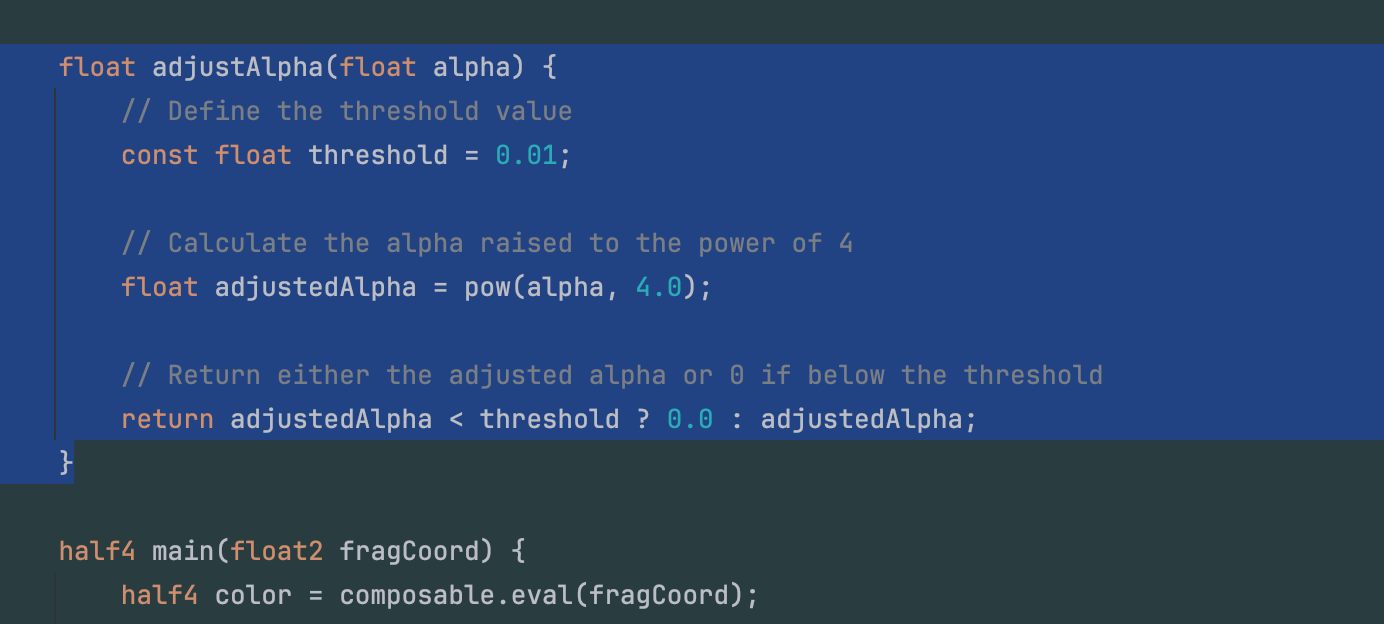
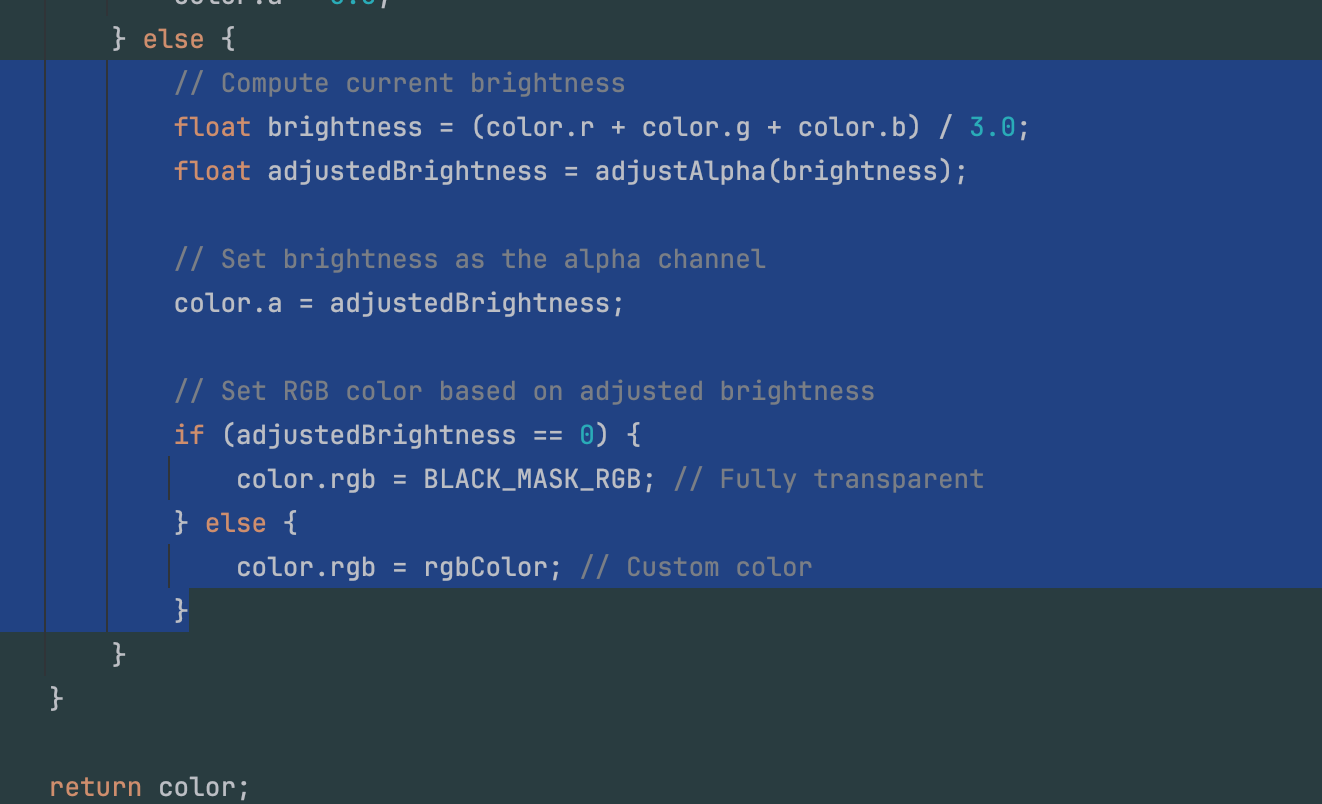
@Language("AGSL")constvalShaderSource_outlined_marker_color_and_marker_brightness=""" uniformshadercomposable;uniformfloatcutoff_min;// Minimum cutoff value for transparency uniformfloatborder_thickness;// Thickness of the border uniformfloat3rgbColor;// RGB color passed as a parameter uniformfloat3rgbMarkerColor;// Marker for Icon tint color // Constant for black (zero) RGB color consthalf3BLACK_MASK_RGB=half3(0.0,0.0,0.0);// Helper function to adjust alpha dynamically floatadjustAlpha(floatalpha){// Define the threshold value constfloatthreshold=0.01;// Calculate the alpha raised to the power of 4 floatadjustedAlpha=pow(alpha,4.0);// Return either the adjusted alpha or 0 if below the threshold returnadjustedAlpha<threshold?0.0:adjustedAlpha;}half4main(float2fragCoord){half4color=composable.eval(fragCoord);// Calculate cutoff_max dynamically using border_thickness floatcutoff_max=cutoff_min+border_thickness;// If alpha is exactly 0.0 (fully transparent), do nothing if(color.a==0.0){// Do nothing }// If alpha is below the minimum cutoff, make it fully transparent and black elseif(color.a<cutoff_min){color.rgb=BLACK_MASK_RGB;// Set to black color.a=0.0;// Fully transparent }// If alpha is within the cutoff range (border area), make it the custom color elseif(cutoff_min<=color.a&&color.a<=cutoff_max){color.rgb=rgbColor;// Set to custom color color.a=1.0;// Fully opaque }// If alpha is above the maximum cutoff but less than fully opaque (outer area), // make it fully transparent and black elseif(cutoff_max<color.a&&color.a<1.0){color.rgb=BLACK_MASK_RGB;// Set to black color.a=0.0;// Fully transparent }// Fully opaque case where alpha = 1 else{if(color.rgb==rgbMarkerColor){// Icon area color.rgb=rgbColor;// Set to Icon color }elseif(color.rgb==rgbColor){// Some black inner metaball area could be opaque - make it transparent color.rgb=BLACK_MASK_RGB;color.a=0.0;}else{// Compute current brightness floatbrightness=(color.r+color.g+color.b)/3.0;floatadjustedBrightness=adjustAlpha(brightness);// Set brightness as the alpha channel color.a=adjustedBrightness;// Set RGB color based on adjusted brightness if(adjustedBrightness==0){color.rgb=BLACK_MASK_RGB;// Fully transparent }else{color.rgb=rgbColor;// Custom color }}}returncolor;}"""